In most modern systems, the default stripe size for RAID lies in the range from 64 KB to 1 MB. Yet, some controllers may support smaller blocks, even as small as 512 bytes. Though optimal for some specific applications, such a stripe size may cause substantial performance problems in view of frequent I/O requests, especially when data is recovered from a very capacious RAID set.
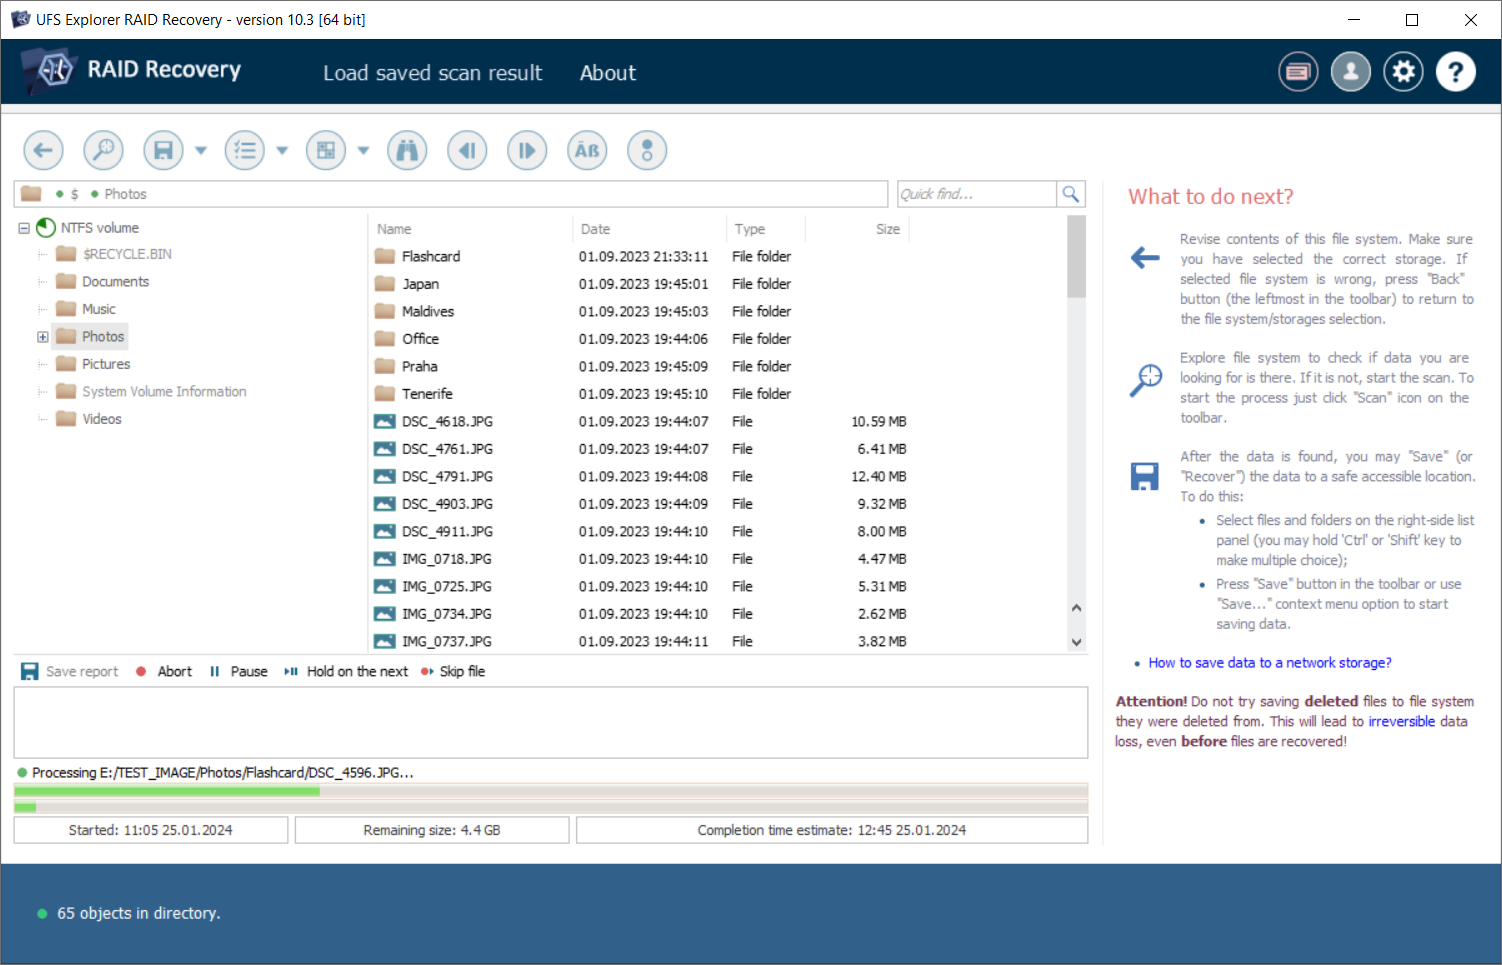
For example, we have a RAID 0 set that consists of three flash drives, with the stripe size of 1 sector (512 bytes). When we initiate copying of a 4.4 GB folder from this array, we see that the time estimated for its completion is 1 hour 40 minutes.
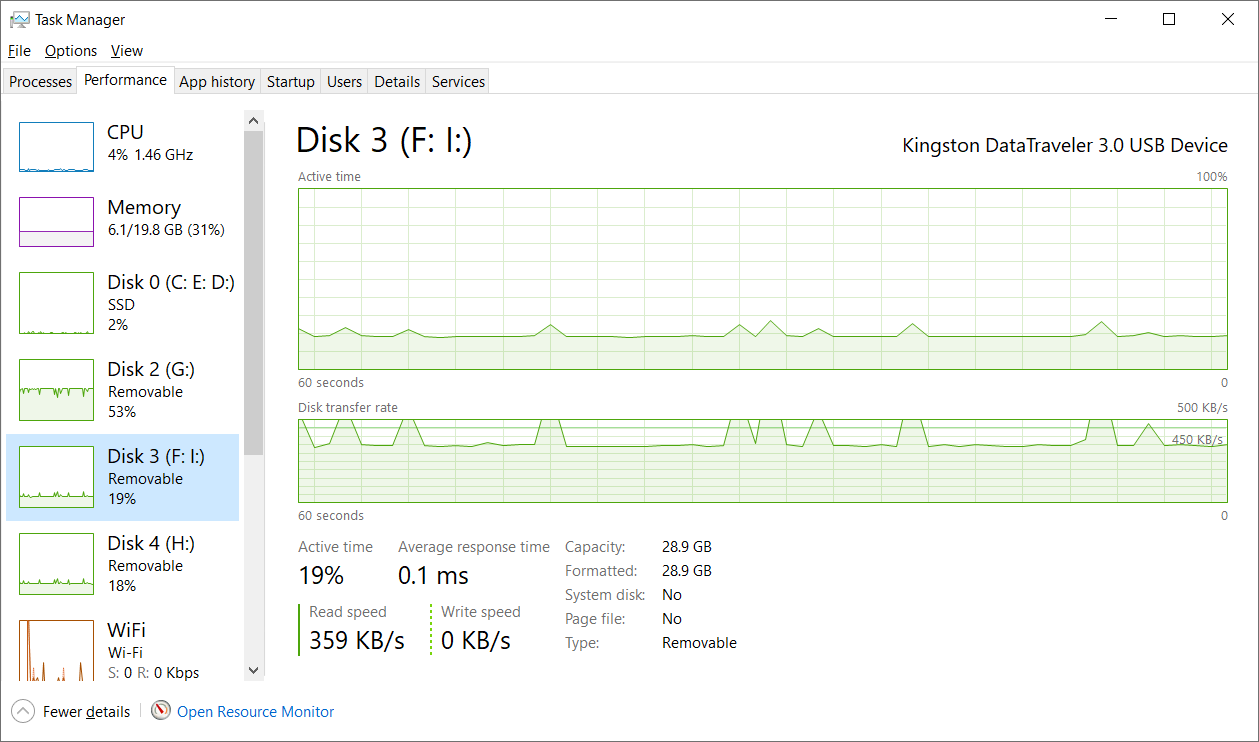
The Performance tab of the Windows Task Manager reports a relatively low reading speed of 359 kbit/s.
Advanced data recovery utilities make it possible to speed up the process by enabling the read cache for each member drive of the array. The feature is available in UFS Explorer Professional Recovery and Recovery Explorer Professional, as well as in the RAID and Network RAID editions of UFS Explorer starting from version 9.13. Once it is applied, the frequently accessed data patterns are copied to the drive’s cache and then retrieved from it instead of the original device, enabling a serious performance boost.
If you want to make use of the reading cache during your RAID recovery, keep to the following procedure. Here it is demonstrated on the example of UFS Explorer RAID Recovery, but can also be performed with the help of other editions by the same analogy.
-
Download, install and run the software.
After you start the program, it will detect all the attached drives and display them in the list of connected storages in the left pane of the main window.

-
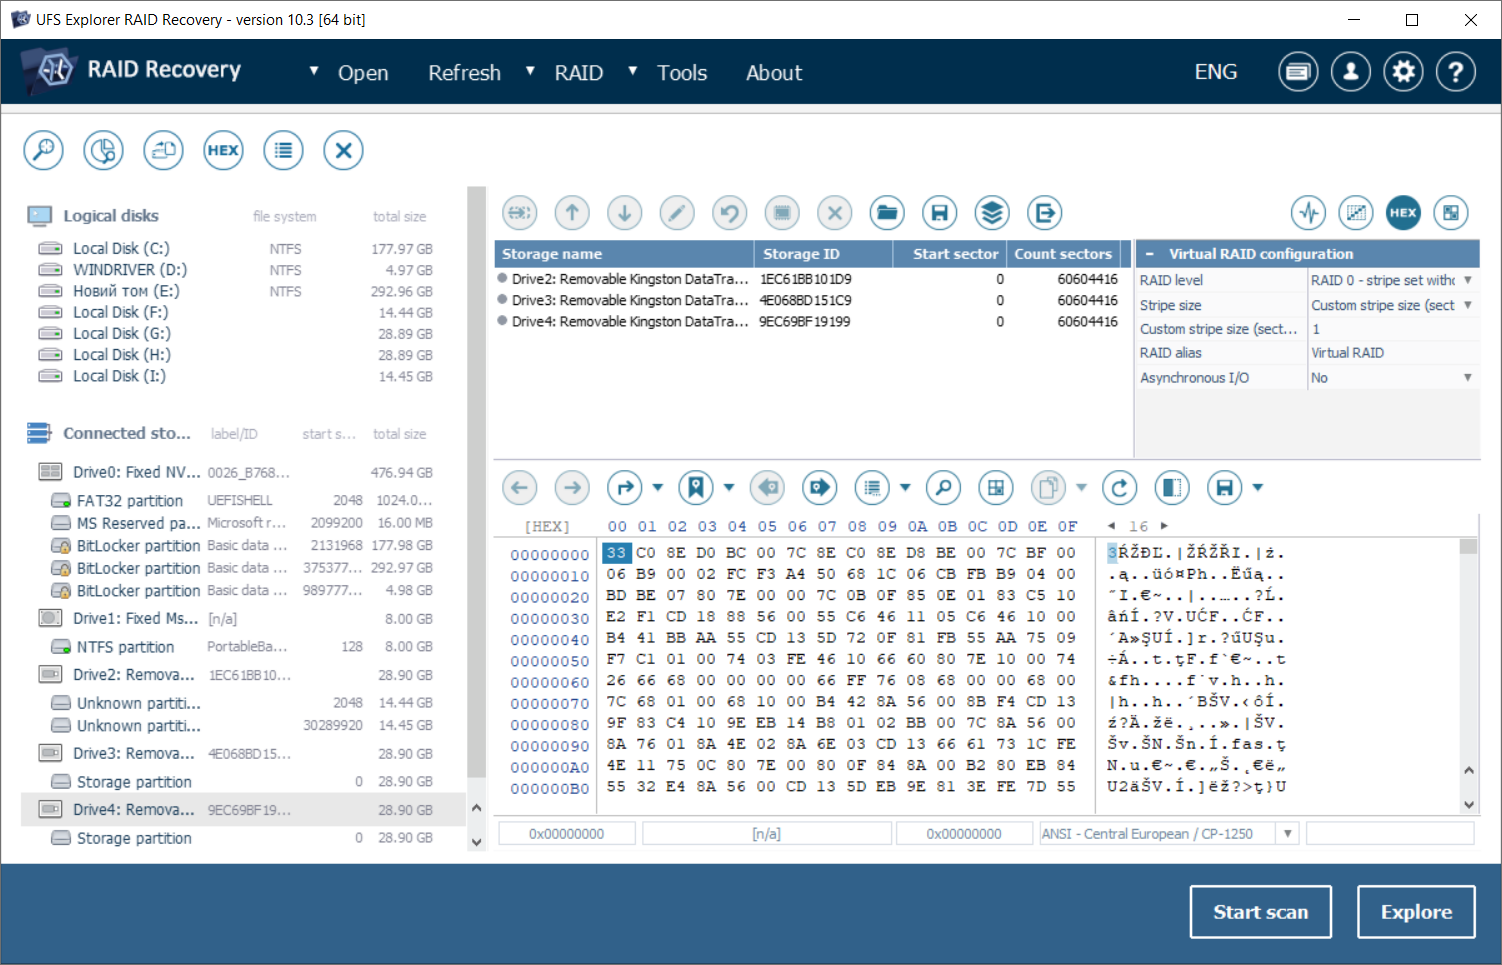
Find the reconstructed RAID set among the detected storages or build it manually from the component drives.
A. The array may be reconstructed automatically and appear below its components. You should use the "Edit RAID configuration" option from the context menu to open its parameters.
B. If the array wasn’t assembled by the program, you will need to define it manually before you can proceed.
-
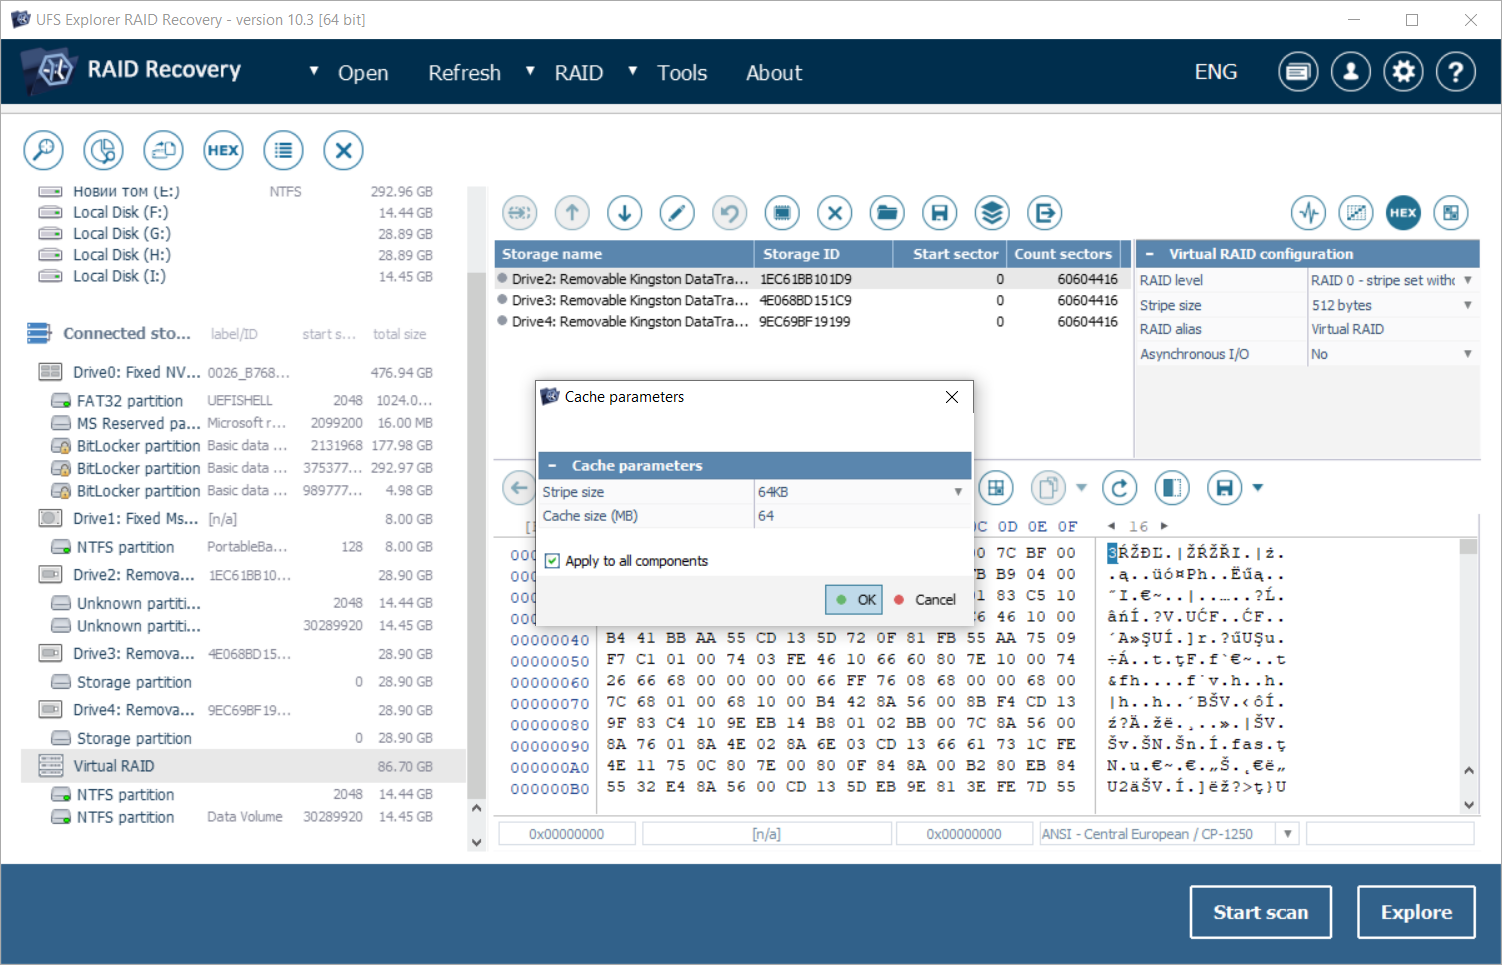
Activate the read cache for each RAID component drive using the dedicated tool from the RAID Builder dialog.
Select each storage item in the list of RAID components and enable the "Set caching parameters" tool from the main toolbar of RAID Builder.
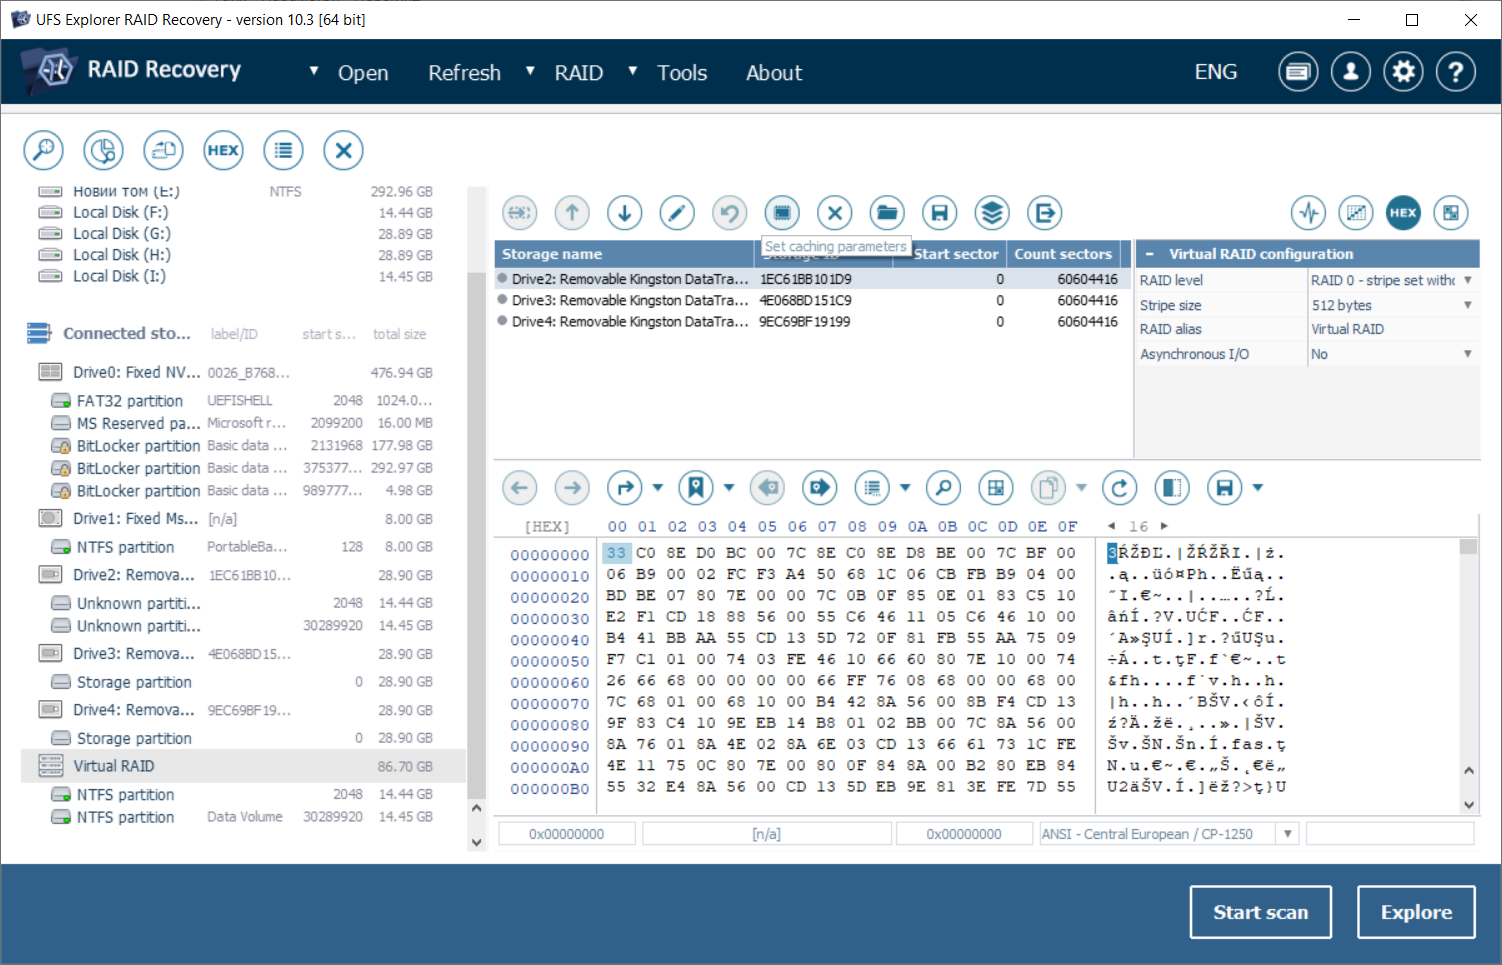
After that, specify the preferred cache settings. You may also apply them to all components at once by putting a tick into the corresponding checkbox.
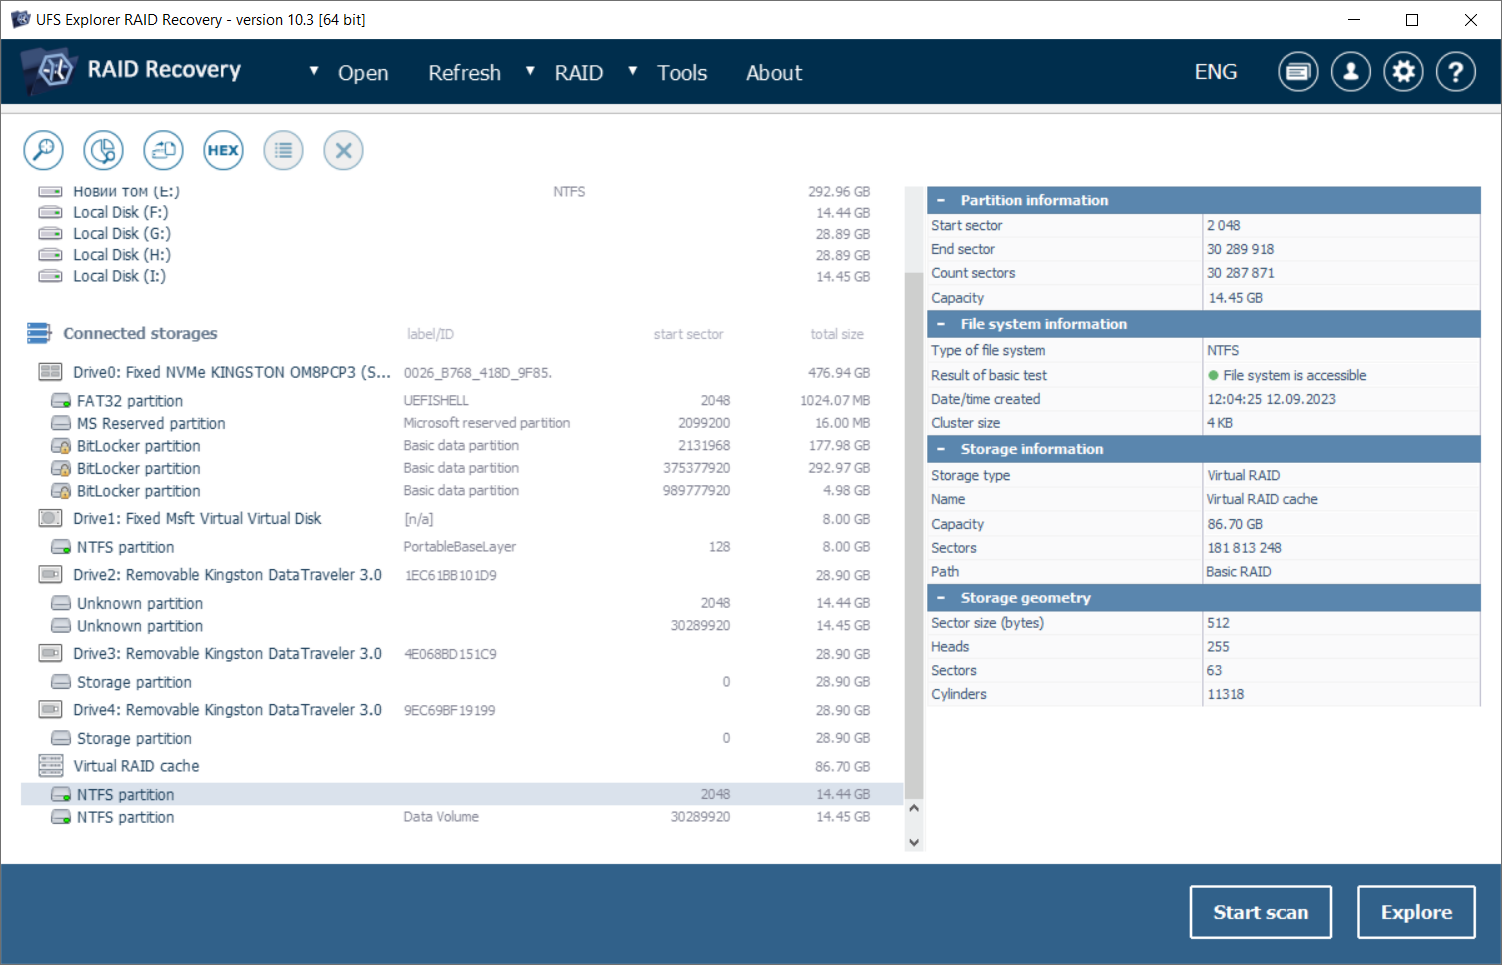
After you press the "Build this RAID" button, this "cached" RAID will show up in the list of storages in the left pane.
-
Explore the file system available on this RAID set and copy the folders/files you need.
Now you can open the partition mounted on the assembled RAID storage and start copying the necessary items.
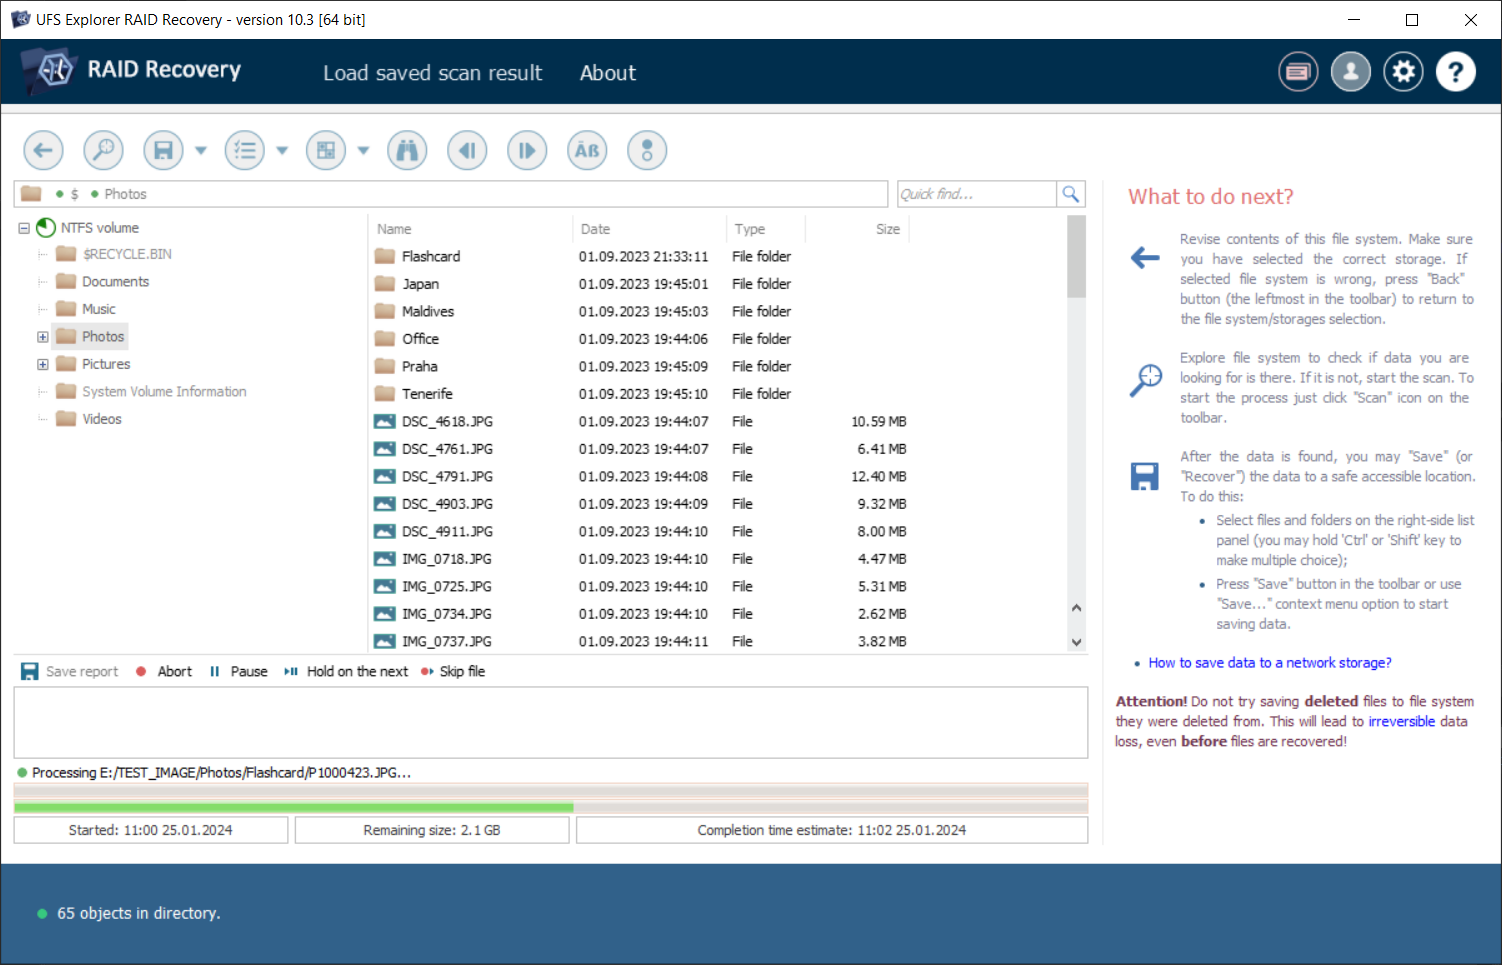
If we look at the duration of the process, in our case, copying of the very same folder takes up to 2 minutes. This is a considerable difference when compared to the initial estimated time of 1 hour 40 minutes.
And the already mentioned Task Manager utility shows much higher reading speed – about 18,4 Mbit/s.

As you can see, this approach provides the notable improvement of performance and allows obtaining the valuable RAID data in the shortest possible time. In our example with the 512 bytes stripe size, copying was completed approximately 50 times faster than it could be without the read cache. Such a difference in speeds is directly dependent on the size of the stripe – the maximum gain can be achieved with the smallest stripe size, whereas with lager stripes it may be less apparent.
The described procedure can be performed with the following software products: